Node-OPCUA goes typescript
The incoming version of node-opcua (version 2.0.0) introduces a better support for typescript and is now nearly completed. This will make it even easier to create comprehensive server or client application within your favorite IDE.
You can try to use it now
$ mkdir node-opcua-goes-typescript
$ cd node-opcua-goes-typescript
$ npm init
$ npm install node-opcua@next
$ npm dedupe
now create a sample.ts file with the following code using your favourite IDE ( I am a fan of WebStorm & VSCode)
import {
    OPCUAClient, AttributeIds, DataValue, Variant, NodeId
} from "node-opcua";

async function main() {

    const client = OPCUAClient.create({ endpoint_must_exist: false});

    client.on("backoff", (retry: number, delay: number) => {
        console.log(" cannot connect to endpoint retry = ", retry,
          " next attempt in " , delay/1000, "seconds");
    });

    // put the endpoint to your OPCUA Server here
    const endpointUrl = "opc.tcp://localhost:48020";

    try {

        await client.connect(endpointUrl);

        const session = await client.createSession();

        const dataValue = await session.read({
            attributeId: AttributeIds.Value,
            nodeId: "i=2258" // Server CurrentTime
        });

        console.log("Server time is ", dataValue.value.toString());

        await session.close();

        await client.disconnect();
    } catch (err) {
        console.log(" err ", err.message);
    }
}

main();
In order to run the script you will need to use ts-node
$ npx ts-node sample.ts
npx is a utility that comes with the most recent version of nodejs and that automatically fetches ts-node
if not present or not up to date on your computer, before running it.
Alternatively, you can install ts-node permanently on your computer
$ npm install -g ts-node
and run your typescript program this way
$ ts-node sample.ts
Do not forget the await keyword! as you may have unexpected behavior at runtime.
However, your IDE should warn you if you forget to do something with the Promised returned by an async function.
All asynchronous API are available either with a Promise or Callback version, you can therefore using in either context. Node-opcua automatically detects which version you’re trying to use by checking if he lastet argument is a callback function or not. This will allow you to transition smoothly from callback to async/await in your code.
// callback version
function readSomeNode1(session: ClientSession, nodeId: NodeId, callback:(err?: Error|null ) => void) {
     session.read({ nodeId: "i=2258",  attributeId: AttributeIds.Value}, function( err: Error|null, dataValue?: DataValue) => {

         if (err){ return callback(err);}
         console.log(dataValue!.toString());
         callback();
     });
}
// Promise version
async function readSomeNode2(session: ClientSession, nodeId: NodeId) {
     const dataValue = async session.read({ nodeId: "i=2258", attributeId: AttributeIds.Value});
    console.log(dataValue!.toString());
}
You will notice a few breaking changes with the previous version: Those changes are here top better isolate the public api from the private code and also to better conform to the callback. This is documented in this wiki page.
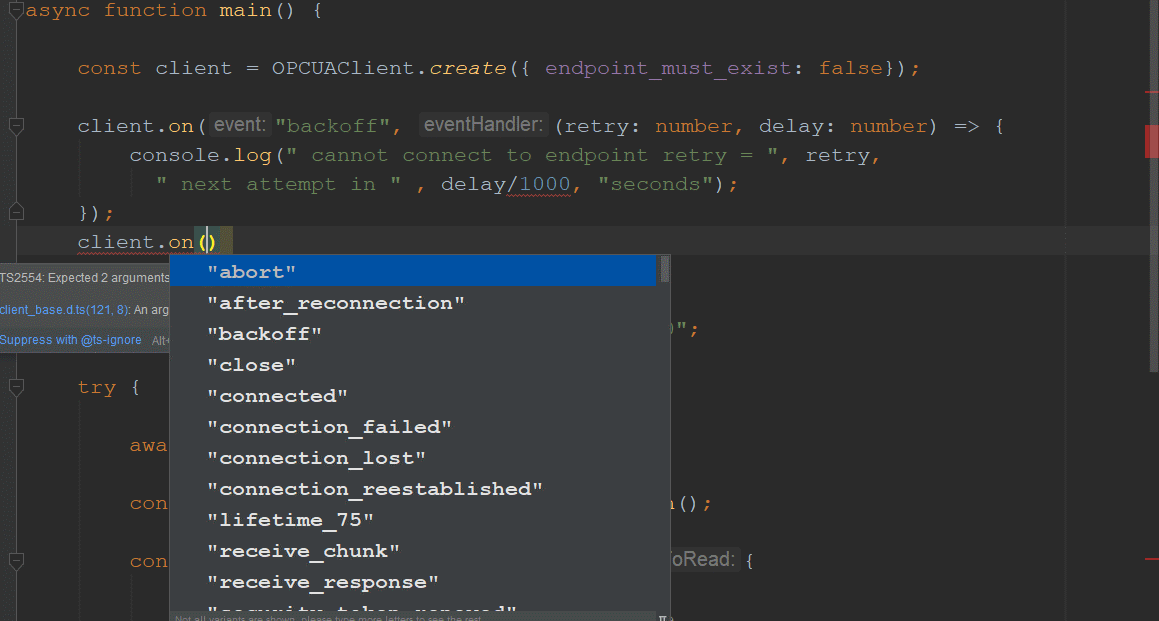
Typescript Inspection
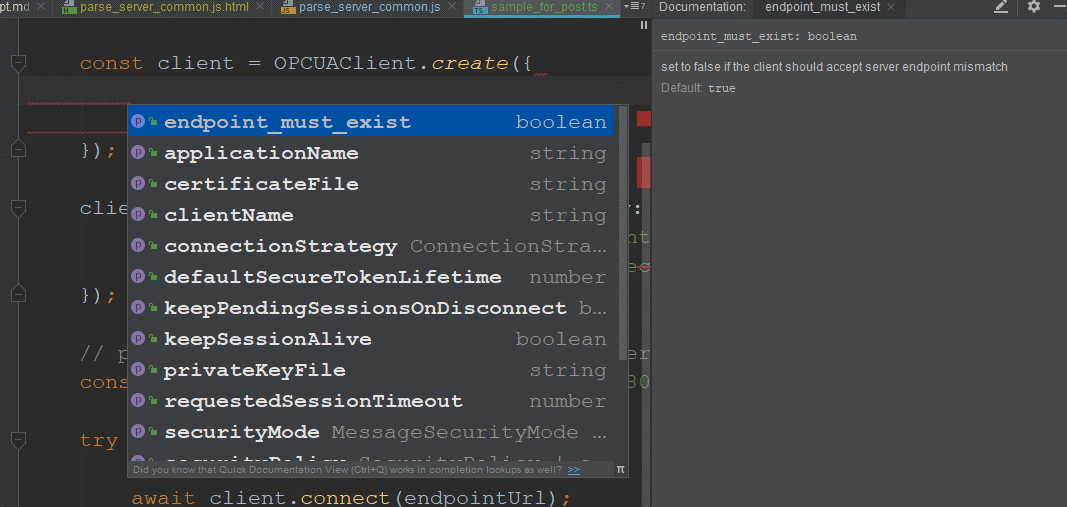
With Typescrip you will be able to easily find what function to call and what arguments is needed
If you wonder what are the options you can pass to the OPCUAClient constructor you could press CTRL+SPACE in Webstorm to get a list of possible field. If you press CTRL+Q you can even get the associated field documentation in the right side panel.
This is also useful to find the various overloaded version of the same method, for instance you can discover this way all the type of eventName that you could listen to on the session object.